

If you still make shoppers type card numbers, you’re asking them to leave.
One-click wallets like Apple Pay, Google Pay, and PayPal let customers pay in a tap, cutting checkout time by 60–80% and often improving authorization rates.
For operators, that means fewer abandoned carts, higher conversion, and recovered revenue.
This step-by-step integration guide shows the exact frontend and backend work, the metrics to track before and after, and quick tests you can run to prove impact fast.
What Is One-Page Checkout and Why It Matters for Your Business
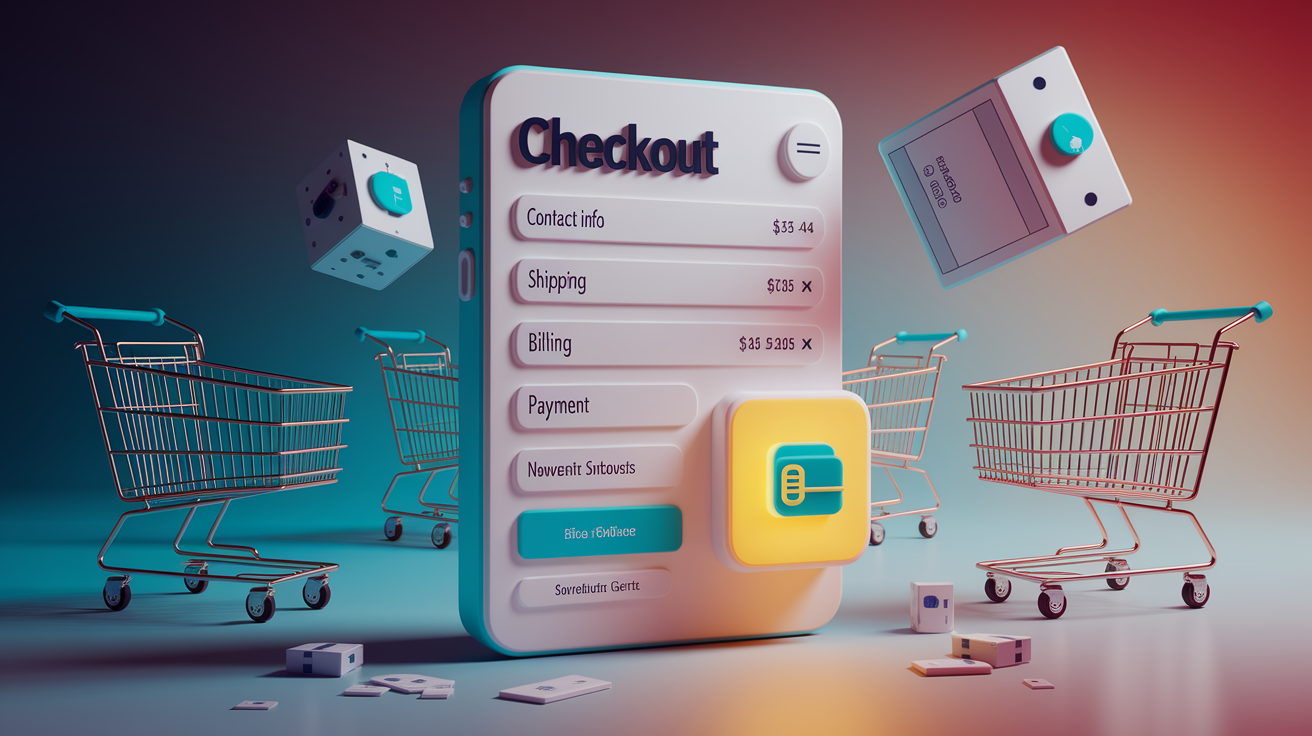
One-page checkout puts everything on a single screen. Contact info, shipping, billing, payment. No clicking through four separate pages, no “next” buttons. The shopper sees all the fields at once and finishes the purchase in one view.
The business reason is simple: every extra page you add costs money. Roughly seven out of ten people who put something in their cart never actually pay. On mobile it’s worse, hitting 85 percent in some categories. When someone gets to checkout and sees surprise fees, a registration wall, or a confusing maze of steps, they’re gone.
One-page checkout tackles the three biggest reasons people bail:
Surprise costs (48 percent): shipping, taxes, or random fees appearing late in the process kill nearly half of all checkouts. A one-page layout shows the full price immediately.
Forced registration (24 percent): multi-step flows often lock payment behind account creation. One-page designs let people check out as guests, then offer account creation after the purchase if at all.
Too much complexity (18 percent): click “next” three times, hit an error, and most people either restart or just leave. One-page checkout removes navigation mistakes and keeps everything visible so you can fix errors inline.
For operators, the payoff shows up in conversion rate, average order value, and cart abandonment rate. A five-point conversion lift on $100 million in volume is $5 million in recovered revenue. More than half of purchases now happen on mobile, where every extra tap materially increases the chance someone abandons.
One-page checkout is the foundation. One-click wallets like Apple Pay, Google Pay, and PayPal sit on top of that foundation and compress the whole thing into a single tap.
Key Metrics to Track Before and After Implementation

Get your baseline numbers before changing anything. Without clean before-and-after data, you can’t prove impact.
Collect these six metrics for at least 30 days before launch, split by desktop and mobile:
| Metric | Definition | Why It Matters |
|---|---|---|
| Cart abandonment rate | (1 − [completed orders ÷ carts created]) × 100 | Primary indicator; industry average sits at 70.19% |
| Conversion rate | (completed orders ÷ sessions) × 100 | Measures overall funnel, not just checkout |
| Average order value | total revenue ÷ number of orders | Wallets often lift AOV by reducing hesitation on bigger purchases |
| Checkout completion time | median seconds from cart to confirmation | One-click wallets can cut this by 60–80% |
| Page load time | median time to interactive for checkout | A 1-2 second delay materially increases abandonment |
| Form error rate | failed submissions ÷ total submissions | Shows where friction lives (address validation, card entry) |
After implementation, measure both absolute and relative lift. Moving from 30 percent conversion to 33 percent is a 3-point absolute lift and a 10 percent relative lift. Run tests for at least two full weeks to account for weekly traffic patterns. If you’re under 10,000 checkout sessions per week, extend to four weeks to hit statistical significance.
Track authorization rate too: completed payments divided by attempted payments. Network tokenization and smart routing typically lift authorization by 2–4 percent immediately and 5–10 percent over time. That translates directly to recovered revenue.
Essential Elements of a High-Converting One-Page Checkout
Start with the bare minimum of required fields. Every field costs conversions. For most physical goods, you need:
- Full name
- Shipping address
- Phone (optional unless your carrier or fraud tools require it)
Don’t ask for billing address separately unless your payment processor forces it. Most modern gateways support address verification using the shipping address.
Use a single-column layout. Two columns increase cognitive load on mobile and make tabbing unpredictable. Stack everything vertically: contact, shipping, payment.
Keep the order summary visible at all times. On desktop, pin it to a sidebar. On mobile, use a collapsible accordion showing subtotal, shipping, taxes, and total at the top. When people can see their total cost and line items inline, they’re less likely to leave.
Offer guest checkout as the default. Show one email field with a button labeled “Continue as Guest.” Put account creation below it with less visual weight, or skip it entirely until the thank-you page with an optional “Save your info for next time” prompt.
Let people edit their cart inline. Quantity, size, color changes without leaving checkout. A “Remove” link next to each line item reduces abandonment from second thoughts.
Use clear calls to action. Label the final button “Complete Order” or “Place Order,” not “Submit” or “Continue.” On mobile, make it sticky so it stays visible while scrolling.
Display trust signals near payment fields. Show accepted card logos, security badges (or just a padlock with “Secure checkout”), and a short return-policy link. Position these right above or beside the payment inputs so they’re visible when someone pulls out their card.
Add visual completion indicators. If you use collapsible sections, mark completed ones with a checkmark or green highlight.
Be careful with promo-code fields. If you show them prominently, people leave to hunt for codes and often don’t come back. Either hide it behind a small “Have a promo code?” link or auto-apply active promotions above the order summary. Like: “Free shipping applied, you’re saving $12.00.”
Payment Methods and One-Click Wallet Strategy

At minimum, accept Visa, Mastercard, and American Express. These three cover most card transactions in most markets.
Add digital wallets to enable one-click checkout. Prioritize:
Apple Pay: dominant on iOS. iPhone represents more than half of mobile commerce in the U.S. and similar shares in Western Europe and Japan.
Google Pay: covers Android and Chrome browser on desktop. Essential for markets with high Android penetration.
PayPal: cross-platform. Strong brand recognition among older demographics and international shoppers who trust PayPal for buyer protection.
One-click wallets eliminate manual entry. A shopper with a saved card taps the wallet button, authenticates with biometrics (Face ID, Touch ID, fingerprint), and finishes payment in two seconds. Checkout completion time drops by 60–80 percent, and authorization rates improve because the wallet provider validates the payment in real time.
Consider Buy Now, Pay Later for higher-ticket items. Klarna and Afterpay reduce abandonment by roughly 20 percent on orders above $100, and by nearly 30 percent among shoppers aged 18–34. BNPL providers typically offer plug-and-play integrations and bear fraud risk.
For international sales, support local payment methods:
PIX (Brazil): instant bank transfer, mandatory for serious Brazilian market penetration.
iDEAL (Netherlands): bank-redirect method used by most Dutch online shoppers.
UPI (India): real-time mobile payments, ubiquitous in India.
Routing payments through a local acquirer in each market can lift authorization rates by up to 16 percent compared to routing everything through a single foreign processor. If you operate in multiple regions, work with a payment orchestration platform that supports region-specific routing rules.
Frontend Wallet Integration: Payment Request API and Native SDKs

The browser Payment Request API is the fastest way to enable wallets on web checkout. It provides a unified interface that automatically surfaces Apple Pay on Safari, Google Pay on Chrome, and other saved payment methods depending on the user’s browser and device.
Basic Payment Request API flow:
if (window.PaymentRequest) {
  const supportedMethods = [
    { supportedMethods: 'https://apple.com/apple-pay' },
    { supportedMethods: 'https://google.com/pay' }
  ];
  const paymentDetails = {
    total: {
      label: 'Total',
      amount: { currency: 'USD', value: '49.99' }
    }
  };
  const request = new PaymentRequest(supportedMethods, paymentDetails);

  request.show()
    .then(paymentResponse => {
      // Send paymentResponse.details to your server for processing
      return fetch('/process-payment', {
        method: 'POST',
        body: JSON.stringify(paymentResponse.details)
      })
      .then(() => paymentResponse.complete('success'));
    })
    .catch(err => console.error(err));
}
This snippet checks for Payment Request support, defines accepted wallet methods, displays the wallet sheet, and forwards the tokenized payment data to your server. Production code will include shipping-address collection, line item details, and error handling.
Apple Pay JS requires additional merchant validation. Apple’s servers verify your domain before displaying the payment sheet. Setup:
- Register your merchant ID in the Apple Developer portal.
- Download and host the domain-association file at
https://yourdomain.com/.well-known/apple-developer-merchantid-domain-association. - On button click, call
ApplePaySession.canMakePayments()to check eligibility. - In the
onvalidatemerchantcallback, send the validation URL to your server, which calls Apple’s validation endpoint and returns a merchant session object.
Example validation flow (server-side pseudo-code):
POST https://apple-pay-gateway.apple.com/paymentservices/startSession
Headers:
  Content-Type: application/json
Body:
  { "merchantIdentifier": "merchant.com.yourstore", "domainName": "yourdomain.com", "displayName": "Your Store" }

Response:
  { "merchantSessionIdentifier": "...", "signature": "..." }
Return that response to the client, complete the session, collect payment data, and send the encrypted payload to your payment processor for decryption and authorization.
Google Pay uses a configuration JSON and button integration. Example:
const paymentsClient = new google.payments.api.PaymentsClient({ environment: 'PRODUCTION' });

const paymentDataRequest = {
  apiVersion: 2,
  apiVersionMinor: 0,
  allowedPaymentMethods: [{
    type: 'CARD',
    parameters: {
      allowedAuthMethods: ['PAN_ONLY', 'CRYPTOGRAM_3DS'],
      allowedCardNetworks: ['VISA', 'MASTERCARD', 'AMEX']
    },
    tokenizationSpecification: {
      type: 'PAYMENT_GATEWAY',
      parameters: { gateway: 'stripe', 'stripe:version': '2020-08-27', 'stripe:publishableKey': 'pk_live_...' }
    }
  }],
  transactionInfo: {
    totalPriceStatus: 'FINAL',
    totalPrice: '49.99',
    currencyCode: 'USD'
  },
  merchantInfo: { merchantName: 'Your Store' }
};

paymentsClient.loadPaymentData(paymentDataRequest)
  .then(paymentData => {
    // paymentData.paymentMethodData.tokenizationData.token contains the encrypted payload
    // Send to your server
  })
  .catch(err => console.error(err));
The gateway parameter tells Google Pay which processor will decrypt the token. Stripe, Braintree, and most major gateways are supported. Configure your gateway’s publishable key in the tokenization specification.
PayPal Smart Buttons load via the PayPal JavaScript SDK:
<script src="https://www.paypal.com/sdk/js?client-id=YOUR_CLIENT_ID¤cy=USD"></script>
<div id="paypal-button-container"></div>
<script>
paypal.Buttons({
createOrder: function(data, actions) {
return actions.order.create({
purchase_units: [{ amount: { value: '49.99' } }]
});
},
onApprove: function(data, actions) {
return actions.order.capture().then(function(details) {
// Order captured; send details.id to your server for fulfillment
});
}
}).render('#paypal-button-container');
</script>
PayPal handles the payment sheet, buyer authentication, and fund capture. You receive an order ID to record in your system.
Button placement: surface wallet buttons prominently. On mobile, place them above the manual card-entry form. On desktop, show them in a visually distinct group at the top of the payment section with a label like “Express checkout.” Buttons should be large enough for easy tapping, minimum 44×44 CSS pixels on mobile.
Server-Side Tokenization, Payment Intents, and Secure Processing

Never handle raw card numbers on your server. Use tokenization to reduce PCI scope and simplify compliance.
When a wallet returns a payment token, send it directly to your payment gateway for authorization. Example with Stripe:
POST https://api.stripe.com/v1/payment_intents
Headers:
  Authorization: Bearer sk_live_...
Body:
  amount=4999
  currency=usd
  payment_method_data[type]=card
  payment_method_data[card][token]=tok_abc123
  confirm=true
Stripe decrypts the token, authorizes the payment, and returns a payment-intent object with status succeeded or requires_action (for 3D Secure). Your server records the intent ID and updates the order status.
For stored payment methods and one-click flows on repeat purchases, create a payment method object and attach it to a customer record:
- On first purchase, call
POST /v1/payment_methodswith the token and attach tocustomer_id. - Store the
payment_method_idin your database alongside the customer record. - On subsequent purchases, create a payment intent using the stored
payment_method_idwithout asking for card details again.
Network tokenization keeps stored credentials fresh. When a card expires or is reissued, the card network automatically updates the token. This typically reduces declines from expired cards by roughly 18 percent. Most processors (Stripe, Braintree, Adyen) support network tokenization. Enable it in your dashboard settings.
Implement webhook handlers for asynchronous events. Wallets and some BNPL providers send delayed capture or refund notifications. Example events to handle:
payment_intent.succeededpayment_intent.payment_failedcharge.refundedcharge.dispute.created
Your webhook endpoint should verify the signature, parse the event payload, and update your order and customer records. For high-traffic stores, queue webhook processing to avoid blocking the payment flow.
Use idempotency keys for all payment API calls to prevent duplicate charges if a request is retried. Most gateways accept an Idempotency-Key header. Generate a unique key per transaction (example: order UUID + timestamp hash) and include it in every payment request.
Platform-Specific Implementation: Shopify, WooCommerce, and Custom Builds
Shopify
Shopify offers native accelerated checkout with Shop Pay, Apple Pay, and Google Pay enabled by default if you use Shopify Payments. To activate:
- Go to Settings → Payments.
- Confirm Shopify Payments is active.
- Under “Accelerated checkout,” toggle on Shop Pay, Apple Pay, and Google Pay.
- Add your Apple Pay domain in Settings → Payments → Apple Pay (Shopify handles merchant validation automatically).
For third-party gateways (Stripe, Braintree), install the gateway’s Shopify app and follow its wallet-enablement instructions. Customization options are limited on Shopify’s hosted checkout. If you need advanced routing or custom wallet buttons, consider Shopify Plus with Checkout.liquid access or a headless architecture using the Storefront API.
WooCommerce
WooCommerce requires plugins for wallet support. Recommended:
- WooCommerce Stripe Payment Gateway: official plugin, enables Apple Pay and Google Pay via Stripe.
- PayPal Checkout: official PayPal plugin, adds Smart Buttons to cart and checkout pages.
- WooCommerce Payments: Stripe-powered native solution from Automattic. Enables one-click wallets and BNPL (Afterpay, Klarna if available in your market).
Install via Plugins → Add New, activate, and enter API keys. Most plugins surface wallet buttons automatically on the checkout page. For cart-page buttons, enable the “Express checkout” option in plugin settings.
If you need finer control (button styling, conditional display, routing rules), use the Stripe Elements API or Braintree Drop-in directly in your theme’s checkout.php template. This requires custom JavaScript and server-side webhook handling but allows per-market routing and advanced fraud rules.
Custom builds (React, Vue, Next.js, etc.)
Integrate wallets via Payment Request API (browser) or native SDKs (iOS, Android) depending on your stack.
For single-page React checkouts:
- Install the Stripe or Braintree client SDK:
npm install @stripe/react-stripe-js. - Wrap your checkout component in
<Elements>provider with your publishable key. - Use the
<PaymentRequestButtonElement>component, which automatically renders Apple Pay/Google Pay buttons if available. - Handle the
onPaymentMethodcallback to send the payment method to your server.
Example:
import { PaymentRequestButtonElement, useStripe } from '@stripe/react-stripe-js';

function ExpressCheckout({ total }) {
  const stripe = useStripe();
  const [paymentRequest, setPaymentRequest] = useState(null);

  useEffect(() => {
    if (!stripe) return;
    const pr = stripe.paymentRequest({
      country: 'US',
      currency: 'usd',
      total: { label: 'Total', amount: total * 100 },
      requestPayerName: true,
      requestPayerEmail: true
    });
    pr.canMakePayment().then(result => {
      if (result) setPaymentRequest(pr);
    });
    pr.on('paymentmethod', async (ev) => {
      const res = await fetch('/create-payment-intent', {
        method: 'POST',
        body: JSON.stringify({ payment_method: ev.paymentMethod.id, amount: total * 100 })
      });
      const { clientSecret } = await res.json();
      const { error } = await stripe.confirmCardPayment(clientSecret);
      ev.complete(error ? 'fail' : 'success');
    });
  }, [stripe, total]);

  return paymentRequest ? <PaymentRequestButtonElement options={{ paymentRequest }} /> : null;
}
For headless or native mobile apps, use the Stripe iOS/Android SDK or Braintree native SDK. These libraries provide pre-built wallet UI components and handle token exchange, merchant validation, and error states.
Intelligent Payment Routing and Multi-Acquirer Redundancy

Single-provider setups are risky. Processor outages, rate-limit throttles, and regional downtime cost an estimated $44 billion in lost sales annually. Multi-acquirer redundancy and smart routing mitigate that risk and lift authorization rates.
Why routing matters: authorization rates vary by acquirer, card network, issuer geography, and transaction risk profile. A transaction declined by Acquirer A might succeed with Acquirer B because B has better relationships with the issuing bank or uses different risk models.
Smart routing logic:
Geographic routing: route cards issued in Region X to a local acquirer in Region X. Local acquirers often have 10–16 percent higher approval rates than cross-border processors.
Cost-based routing: route low-value, low-risk transactions to the lowest-cost processor. Route high-value or high-risk transactions to a processor with advanced fraud tools.
Performance-based routing: track authorization rate by acquirer over rolling 7-day windows. Automatically shift traffic to the top performer.
Failover: if Acquirer A times out or returns a network error, immediately retry via Acquirer B within 2–3 seconds. Retry insufficient-funds declines during the next payroll cycle window (typically early morning on paydays).
Most payment orchestration platforms (Stripe with Adaptive Acceptance, Adyen, Checkout.com) provide routing dashboards. Set rules like:
IF card_country == 'BR' THEN route_to acquirer_pix_local
ELSE IF transaction_amount > 500 AND risk_score > 70 THEN route_to acquirer_fraud_engine
ELSE route_to acquirer_lowest_cost
Measure lift by comparing authorization rates before and after routing rollout. A typical 2–4 percent immediate improvement compounds over time as the system learns which acquirer performs best for each transaction type.
Implement retry logic carefully. Retry network timeouts and temporary issuer errors immediately via alternate acquirer. Wait 24–72 hours before retrying insufficient-funds declines. Don’t retry hard declines (fraud, closed account, incorrect CVV after multiple attempts).
Reducing Friction with Autofill, Address Lookup, and Inline Validation

Manual typing on mobile keyboards is slow and error-prone. Reduce typing with browser autofill, address autocomplete, and real-time validation.
Browser autofill
Use standard HTML5 autocomplete attributes so browsers can pre-fill fields from saved profiles. Essential attributes:
autocomplete="name"for full nameautocomplete="email"autocomplete="tel"autocomplete="street-address"for full address (or split intoaddress-line1,address-line2)autocomplete="postal-code"autocomplete="country"autocomplete="cc-number",autocomplete="cc-exp",autocomplete="cc-csc"for card fields
Label your inputs semantically and apply the correct name and id attributes:
<input type="text" name="name" id="name" autocomplete="name" placeholder="Full name" required />
<input type="email" name="email" id="email" autocomplete="email" placeholder="Email" required />
Browsers that support autofill will display a prompt like “Use address from [contact card]” when the user focuses a field.
Address autocomplete
Integrate Google Places Autocomplete API or a similar service (Loqate, Mapbox) to let shoppers type a few characters and select their address from a dropdown. This reduces shipping errors and speeds checkout by 30–50 percent.
Minimal Google Places integration:
<script src="https://maps.googleapis.com/maps/api/js?key=YOUR_API_KEY&libraries=places"></script>
<input id="address" type="text" placeholder="Start typing your address" />
<script>
  const input = document.getElementById('address');
  const autocomplete = new google.maps.places.Autocomplete(input, { types: ['address'] });
  autocomplete.addListener('place_changed', () => {
    const place = autocomplete.getPlace();
    // Parse place.address_components and fill street, city, state, zip fields
  });
</script>
Parse the structured address components returned by the API and populate your form fields automatically. This eliminates typos in street names and postal codes, common causes of failed deliveries and support tickets.
Real-time inline validation
Validate fields as the user types or on blur. Display specific error messages immediately below the field:
- “Please enter a valid 16-digit card number” (not “Invalid input”)
- “Email address must include an @ symbol”
- “Postal code must be 5 digits”
Use visual indicators: green checkmark for valid, red border and message for invalid. Never wait until form submission to show errors. Catching mistakes inline reduces form abandonment by roughly 20 percent.
For card numbers, use the Luhn algorithm to validate format before submission. Display the detected card brand (Visa, Mastercard) next to the field so the shopper knows the number was recognized.
Security, Compliance, and Visible Trust Signals

SSL/TLS is mandatory. Serve your entire checkout over HTTPS and display the padlock icon in the browser address bar. Most modern browsers mark non-HTTPS checkout pages as “Not Secure,” which immediately tanks trust.
Display visible security badges near payment fields:
- Norton Secured or McAfee Secure seals (if you have partnerships)
- Simple text like “Secure checkout” with a padlock icon
- Logos of accepted payment methods (Visa, Mastercard, PayPal, Apple Pay)
Position these elements directly above or beside the card-entry form so they’re visible when the shopper is deciding whether to enter payment details.
PCI DSS scope reduction
Tokenization and wallet payments keep raw card data off your servers, reducing PCI compliance burden. If you never touch card numbers (because wallets and gateways handle tokenization), you typically qualify for the simplest SAQ-A questionnaire.
Use your payment processor’s hosted fields or iframes for manual card entry. Stripe Elements, Braintree Drop-in, and similar tools inject secure card inputs into your page without exposing raw card data to your JavaScript. This keeps you out of PCI scope for card handling.
3D Secure and fraud checks
Implement risk-based 3D Secure 2 (3DS2). Modern gateways can apply 3DS step-up only when transaction risk is high, balancing fraud prevention with conversion. Blanket 3DS rules increase abandonment by roughly 10–15 percent. Risk-based rules keep abandonment low while reducing fraud chargebacks.
Most orchestration platforms support dynamic 3DS: low-risk transactions skip authentication, high-risk transactions trigger a one-time-password or biometric challenge. Configure your risk threshold based on your fraud rate and tolerance.
Display privacy microcopy near email and phone fields. Example: “We’ll only use your email to send order updates, no spam.” Short reassurances like this reduce hesitation without requiring the shopper to click through to a full privacy policy.
Mobile-First UX: Touch Targets, Biometrics, and Sticky Pay Buttons
More than half of online purchases happen on mobile. Optimize every interaction for thumbs, not mouse cursors.
Touch targets
Minimum size: 44×44 CSS pixels for any tappable element (buttons, links, checkboxes). Smaller targets lead to mis-taps, which frustrate users and increase abandonment.
Space tappable elements at least 8 pixels apart so users don’t accidentally hit the wrong button.
Single-column layout
Stack all fields vertically. Two-column forms on mobile force horizontal scrolling or zooming, which kills conversions. Keep the layout as narrow as the screen, with generous padding on the sides.
Sticky pay button
Fix the “Place Order” button to the bottom of the viewport on mobile so it remains visible while the user scrolls through fields:
.checkout-button {
  position: fixed;
  bottom: 0;
  left: 0;
  width: 100%;
  padding: 16px;
  background: #0070f3;
  color: white;
  font-size: 18px;
  border: none;
  z-index: 100;
}
Make sure the button label is large (18px minimum font size) and action-oriented: “Complete Order, $49.99.”
Biometric wallet flows
Apple Pay and Google Pay use Face ID, Touch ID, or fingerprint authentication. This is faster and more secure than typing a password or CVV. Surface wallet buttons prominently on mobile checkout. Many shoppers now expect to tap once and authenticate biometrically rather than typing card details.
Input types and keyboards
Use correct HTML5 input types to trigger the right mobile keyboard:
<input type="email" />triggers email keyboard with @ key<input type="tel" />triggers numeric keyboard for phone and card numbers<input type="number" inputmode="numeric" />for card CVV and postal code
Correct input types reduce typos and speed entry.
Font sizes
Use at least 16px font size for input fields. Browsers zoom in on inputs smaller than 16px on iOS, forcing the user to zoom back out after typing.
A/B Testing, Analytics, and Continuous Improvement
Run controlled experiments to validate every change. Don’t ship wallet buttons or layout changes based on intuition.
High-priority A/B tests
| Test | Hypothesis | Primary Metric |
|---|---|---|
| Wallet buttons above vs. below manual entry | Placing wallets above the fold increases usage and conversion | Conversion rate, wallet adoption rate |
| Guest checkout default vs. account-required | Guest default reduces abandonment by eliminating friction | Cart abandonment rate |
| Single-column vs. two-column layout | Single-column improves mobile conversion | Mobile conversion rate |
| Promo code visible vs. hidden behind link | Hiding code field reduces abandonment from code-search | Cart abandonment rate |
| Sticky pay button vs. static | Sticky button increases mobile completion | Mobile conversion rate |
Run each test for at least two weeks to account for weekly traffic patterns. Target a minimum of 1,000 conversions per variant to detect a 5 percent lift at 95 percent confidence.
Form analytics
Instrument every field to track:
- Time spent in field
- Error rate per field
- Drop-off rate (users who click into a field but never complete the form)
Identify fields with high error rates (often address, phone, or postal code) and simplify or add inline validation. If 20 percent of users abandon after encountering an error on the “phone” field, consider making phone optional or adding a format hint (“555-123-4567”).
Checkout funnel
Track these funnel steps:
- Cart viewed
- Checkout initiated
- Contact information completed
- Shipping information completed
- Payment information completed
- Order placed
Calculate drop-off rate between each step. High drop-off between “Checkout initiated” and “Contact information completed” suggests friction in the guest-checkout flow or unclear layout. High drop-off at “Payment information” suggests payment-method issues, trust deficit, or unexpected cost reveal.
Heatmaps and session recordings
Tools like Hotjar, FullStory, or Microsoft Clarity show where users click, how far they scroll, and where they hesitate. Use these to identify:
- Rage clicks (user repeatedly clicking non-interactive elements, signaling confusion)
- Field hesitation (long pauses before entering card number, often a trust signal issue)
- Missed wallet buttons (if users scroll past wallets and enter cards manually, move wallets higher)
Post-purchase surveys
Add a one-question survey on the thank-you page: “How easy was checkout?” with a 5-point scale. Correlate responses with session data to identify UX pain points. If users who rated checkout “difficult” also spent 3× longer in the payment section, investigate trust signals and error messages in that section.
Common Implementation Mistakes and How to Avoid Them
Forcing account creation before purchase
Mandatory registration drives 24 percent of abandonment. Let people check out as guests. Offer account creation after purchase with a simple “Save your info for next time?” prompt on the thank-you page.
Hiding wallet buttons below the fold
If someone has to scroll to see Apple Pay or Google Pay, many won’t. Place wallet buttons at the top of the payment section, above manual card entry, with a clear label like “Express checkout.”
Not testing on real devices
Desktop browsers with mobile emulators don’t accurately replicate touch behavior, keyboard issues, or biometric flows. Test on actual iPhones and Android devices across multiple OS versions.
Ignoring load time
A two-second delay in page load increases abandonment measurably. Lazy-load non-critical scripts, compress images, and use a CDN. Measure time to interactive, not just page load, because shoppers can’t interact with a checkout that’s still loading JavaScript.
Over-validating fields
Rejecting valid international phone formats, unusual but legitimate address formats, or names with apostrophes or hyphens creates unnecessary friction. Use permissive validation that catches obvious errors (email without @, card number wrong length) but accepts edge cases.
Not instrumenting the funnel
If you can’t see where people drop off, you can’t fix it. Tag every step (cart viewed, checkout started, contact completed, payment completed, order placed) and monitor drop-off rates weekly.
Skipping mobile-specific UX
More than half of your traffic is mobile. If your checkout isn’t optimized for thumbs, small screens, and spotty connections, you’re losing money. Single-column layout,
Final Words
You walked through a practical one-click wallet flow, an integration checklist, security and UX trade-offs, and the testing and measurement steps to track lift quickly.
The guide focused on where friction sits in checkout and how wallets remove it: faster payments, fewer errors, and higher conversion when done right.
Start with your top 3 SKUs, run an A/B test, and monitor conversion and return rates.
Follow the reduce checkout abandonment with one-click wallets implementation guide and you’ll likely see faster checkout, higher conversion, and smoother customer experiences.
FAQ
I don’t have any People Also Ask items or an article outline to work from. Which topic should the FAQ cover?
Reply with either:
- the People Also Ask / Related Questions list, or
- the article outline, or
- a short topic (example: “dropshipping returns policy,” “Google Ads smart bidding changes”).
If you want, I can draft a general 8-question e-commerce FAQ template instead—want that?